

As a contractor, it’s my job to guide my clients toward the best methods to achieve their goal, whether it’s saving money, adding utility or maximizing energy efficiency. With all of the decisions that need to be made when a buyer chooses a custom log or timber home, they rely on us builders to tap into our experience and ensure all their bases are covered.
The roof of a log or timber home is one of those areas that the average homeowner doesn’t give a whole lot of thought to (aside from the material that will cap it off), but it’s one that can have a sizable impact on their overall satisfaction with the home. The decision isn’t entirely up to the builder or the client, however. The geographic location of the property, as well as the code requirements of that region, can affect the type of roof system required.
For example: If your home will be in a very cool climate, such as Zones 1 or 2, which cover most of New England, the Midwest states surrounding the Great Lakes and the upper Rockies, code will mandate better than R-50 insulation. A builder may suggest stack insulation above the trusses and behind sheathing and decking.
For decades, the traditional stack roof system has been designed kind of like a sandwich — stuffed between the finished roofing material outside and the drywall or tongue-and-groove (T&G) inside, you’ll find layers of oriented strand board (OSB), sheathing, membranes, vapor barriers and insulation. It’s a system that can be expensive and difficult to assemble to the level of energy efficiency that today’s buyers want and that codes demand.
Smartly, many log and timber builders have moved away from this system because it’s labor-intensive to construct and, ultimately, less energy efficient than other alternatives.
Structural insulated panels (SIPs) are one such option —particularly for a timber frame home.
You apply SIPs on a roof just like you would to enclose the timber frame skeleton. SIPs come pre-insulated and, for the most part, pre-cut, so with the use of crane, they go up quickly and fasten into the topside of beams, trusses and rafters easily and invisibly. Because they have very few joints where the panels meet, they seal the structure more thoroughly and offer better continuous insulation than other products on the market.
Another route is to construct a stick-framed roof system with 2-by-12s and/or wood I-joists (or TJIs), enclose it with plywood and fill the cavity with spray foam insulation. This method has proved especially effective for log homes that don’t employ an exposed rafter/truss system, since the roof framework can rest atop the stacked log walls. Using this approach is the equivalent of sealing your home with a Yeti cooler. It’s air tight and incredibly efficient. In terms of costs, dollar for dollar it’s actually less expensive than going the sandwich roof route, primarily because it requires less time and labor to construct. And, over the life of the home, it can save thousands in energy costs.
Of course there are two sides to a roof: the exterior that’s exposed to the elements and the one that faces inside the house. Often, in log and timber homes, that interior face is also the ceiling you see. To finish it off and make it attractive, most log and timber homebuyers opt for drywall or tongue-and-groove (T&G). The thickness of the T&G will be dictated by the spread of (a.k.a., distance between) the timbers or logs, if you have a log home featuring an exposed rafter system. The farther apart the rafters are, the thicker the material needs to be to carry the span. Rafters typically are about 4 feet apart (timber trusses are typically 6 to 8 feet apart) to satisfy the roof’s support requirements, and as such, you can use 2-by-6 T&G.
Keep in mind that, like the other roof components, this finished surface plays a role in a home’s energy efficiency. With a T&G product, there is a joint where the tongue and the groove of each panel meet and, because it’s wood, it can move, shrink and separate with atmospheric conditions. This creates an opportunity for air leakage, potentially weakening your thermal envelope, and, with lesser impact, disrupt the beauty of the ceiling. However, you can thwart this issue by employing one of the alternative roofing methods discussed earlier.
The bottom line is this: Log and timber homes may have a long legacy of tradition and history, but you can still pay homage to that with technologically advanced materials and modern construction techniques. The roof is an excellent place to start. Talk to your builder about the most cost- and energy-efficient ways to cap off your investment, and your home will provide you many seasons of comfort and joy.
Roof Profiles
The shape and pitch of the roofline will be the crowning jewel of your log or timber home. Let’s review the most popular options:


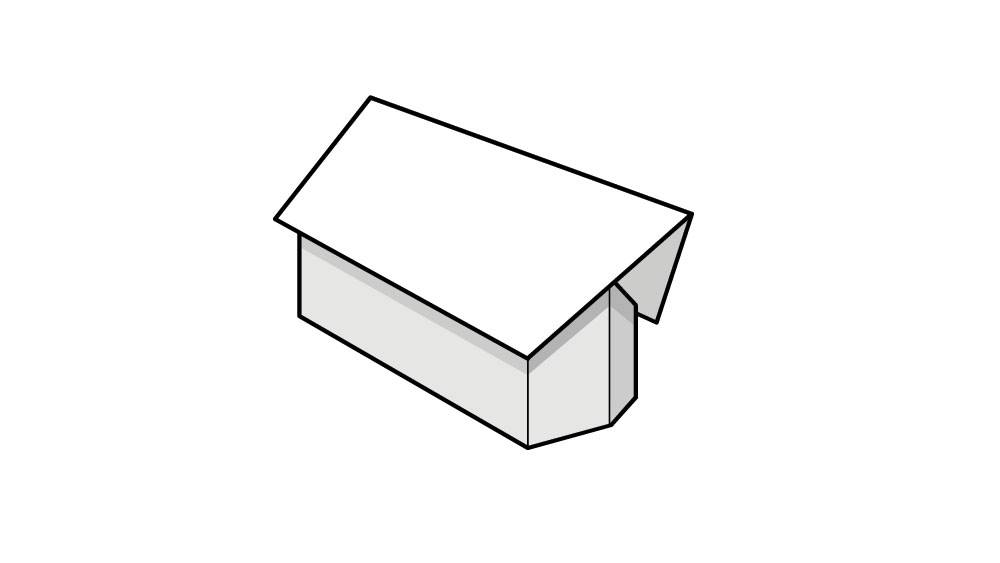


Cross Gable
Covers two or more sections crossing perpendicular to the main section, creating valleys where they meet.
Bonus Tip!
Planning to install tongue-and-groove on your log or timber home’s ceiling? Builder Dan Mitchell strongly recommends staining it before it’s installed — especially if you’re using a dark shade. Not only will it be easier and cleaner to handle, the stain will cover every part of the board, so if there’s any shrinkage or gapping (common with wood products) once it’s installed, every visible surface will be the same color, and gaps will disappear.