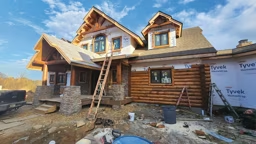


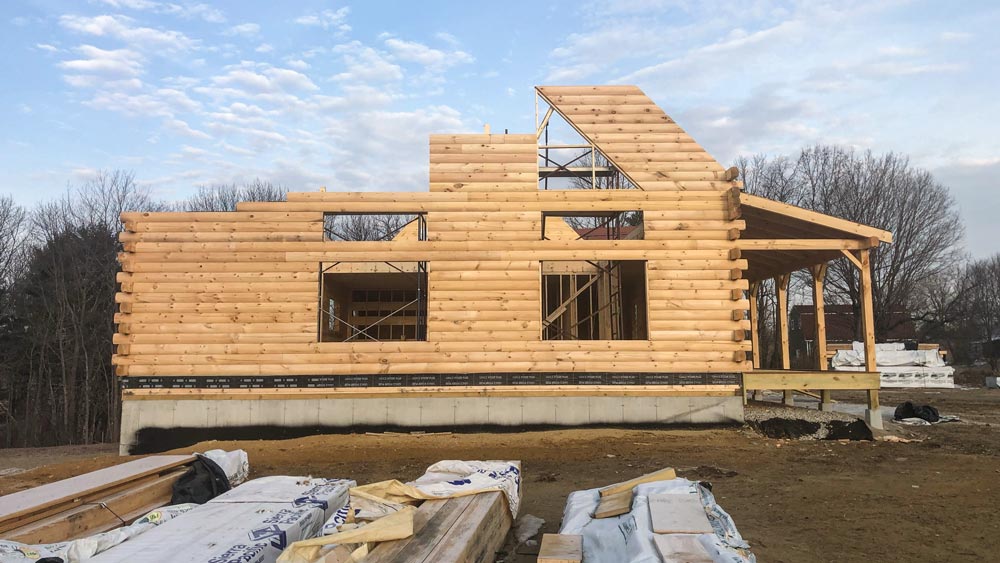

When the walls begin to rise, a log home construction project takes on a new dimension. And for Jim and Michele Ducharme, the big day was both emotional and exhilarating, because this is the phase that truly takes log home plans from dream to reality.
“I remember as the layers went up, I thought it was so cool! As it progressed and we could see the cutouts for the windows, it reminded me of when our two boys used to build things with their Lincoln Logs,” Michele recalls.
“In a traditional stick-built house, you see one wall go up and then another and another and then they tie the walls together,” says Jim. “But in a log home, you see one row of logs go up for the entire house, then another row, and another. It’s kind of like watching a cake being assembled one layer at a time.”
The Ducharmes chose a manufactured package from Coventry Log Homes in New Hampshire, and the kit arrived with logs cut to length and ready to stack and interlock atop the foundation and subfloor.
See also: Finding the Log Company That’s Right for You
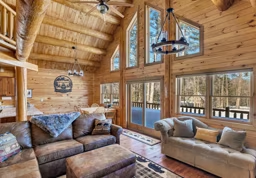
“We went with the D-log shape, where the logs are rounded on the exterior but flat on the interior side,” explains Jim. This choice affords flat walls, which enable furniture and artwork to be flush with the wall, but still achieve that round-log cabin look from the curb. “We also chose butt-and-pass-style log corners to get that traditional log home look,” he says.
See also: Choosing Logs (Profiles and Packages)
After considering several log species, the Ducharmes chose eastern white pine, preferring the color and knotty appearance of the wood, which also are ideal for achieving the shade of stain the couple wanted.
As exciting as it is, a stage this significant can also be a bit nerve-racking. When concerns arose, Jim and Michele’s builder was reassuring.
“Our biggest issue in watching the log walls go up was the natural ‘staining’ that was happening due to rain and snow exposure. The time that the untreated wood was sitting out in the elements was causing it to turn gray and just look terrible!” exclaims Jim. “With a log home, your finished interior and exterior walls are getting rained on, snow piling up inside — and not just for a day. It took a couple of months for our house to be weathertight, and by the time it was, the logs looked horrible.”
While understandable, Jim’s fears were unfounded and, ultimately, alleviated.
“The entire time our builder, Brandon, told us, ‘Don’t worry! We will clean them up and they will look as good as new.’ I asked, ‘Clean them up? How long will that take?’” recalls Jim, reliving the concern he had over the process. “Brandon brought in our stain guy, Matt, who was an expert at log home staining and maintenance. He showed us the process to clean the logs through his spray, and it truly was amazing how good it looked and how quickly they did it.”
For Jim and Michele, the roof design, both in looks and functionality, proved to be one of the most critical components of construction. Sitting down with the folks at Coventry, they discussed, at length, the pros and cons of each option.
See also: Choosing a Log Home Company
“There were essentially two different roof styles we had to choose from: purlin or rafter,” notes Jim. “Purlin roofs are supported by beams that run horizontal to the ridge beam, the big beam that runs the length of the house at the peak of the roof. Traditional rafter roofs include roofing structural elements connecting from the top of the wall to the ridge beam to support the roof.”
Jim and Michele originally favored the purlin variety, envisioning the dramatic appeal of exposed beams in their great room, even though it would involve a significant number of structural logs and posts to support the sheer weight of the system. As the decision process moved along, they discovered that a purlin roof would require a heavy, 28-foot support post right in the middle of their great room and dining area, which interrupted the open flow they sought for their living spaces.
“Our builder consulted with us on the overall look we wanted, and recommended going with a traditional rafter roof,” Jim relates. “He suggested that if we still wanted exposed beams, we could certainly add them wherever we wanted and that we could get the look without needing them to be structural. This not only saved us money, but it also completely changed the weight of the roof and meant the elimination of the 28-foot supporting post in the middle of the great room.”
That’s the consultative process in action and proof it yields the desired results for homeowners. Such win-win outcomes are the stuff a great construction experience is made of, and it continued the Ducharmes path to success.
Next Installment
Be sure to check in with us as Jim and Michele get to work on the mechanical details.