

By Sean Murphy 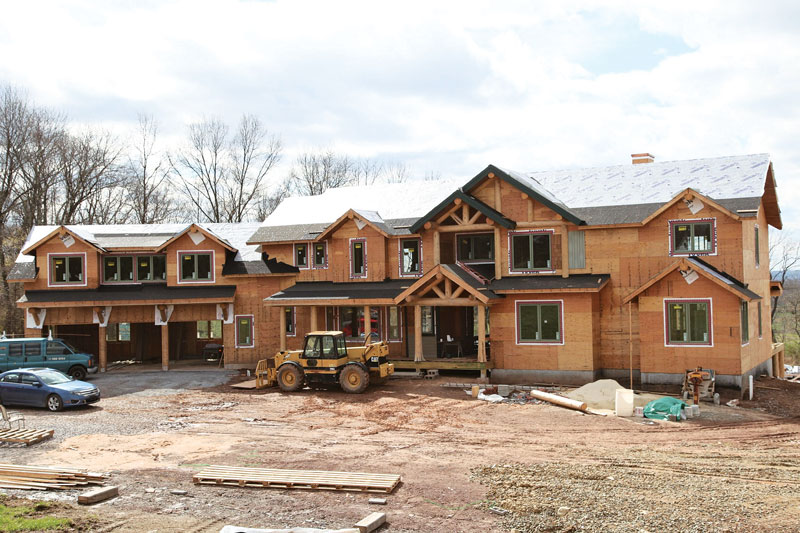
The logs are up, the walls are all framed, the roof is sheathed (and at least minimally covered with a water barrier) and the windows are in. What was once only a figment of my imagination is now a very real thing I can see and touch.
So we can finally say goodbye to the framing crew and move-in day is right around the corner, yes? Not so fast… The framers can go, but a lot of real work is yet to be completed. It’s time for the next group of subcontractors to enter our lives, starting with the rough-in stage for plumbing (including gas), electric and HVAC.
As we’ve learned throughout this process, a log home is a unique structure that requires a little bit of creativity when it comes to installing mechanical systems. It was a challenge adopting some of the normal stick frame concepts for electrical, plumbing and HVAC towards the construction and layout typical with a log home, but there are no obstacles that cannot be overcome. In this installment of my family’s Log Home Journey, I thought I’d share two of our primary challenges and solutions with you.
Challenge #1: Where Did the Walls Go?
Our open floor plan is a key design element, but there is something to be said for the convenience of walls when it comes to planning outlets, switches, lights, vents/returns and plumbing supply lines. The good news, you won’t spend too long pondering over options, since, typically, you won’t have many.
The bad news is that you and your subs might have to choose a less than ideal (or a very creative) location for some of the parts of the home’s nervous, respiratory and circulatory systems. Your GC will likely organize this for you, but expect the plumber to get first dibs. After all, water tends to be controlled primarily by gravity, and electric and HVAC can be more easily adjusted to accommodate.
In the great room, expect to install outlets in the floor, or you’ll be running extension cords a pretty long way to charge your iPad or turn on a reading lamp. Take the time to really plan out your furniture for the room, both now and in the future. Then you can more easily judge the location and spacing of outlets. The nicest part about the process is that you can actually sit in the space now, rather than imagining it based on a construction drawing. I used lawn chairs.
Challenge #2: Heating & Cooling a 25-Foot-Tall Space
Sure, the great room had to be “great,” but yikes! How the heck can we keep this place comfortable? We chose radiant heat throughout the first floor, so we were confident we’d be warm enough during the fall and winter months, since radiant keeps it warmest where you live — the first 8 feet from the floor. The concern really was the summer months and keeping it cool enough.
Here’s where your HVAC contractor earns his keep (and my partner from TerraTherm certainly earned his), since this part is all about measuring your required capacity and taking into account your location, orientation, windows, roof structure and insulation. Once we knew the capacity, one of the biggest questions we had to answer was how to sufficiently condition the volume. In commercial situations and industrial-style flats, large round ducts fastened to the roof or trusses is completely acceptable; but in a typical home, that solution is less than perfect.
We toyed with an idea of running a supply duct along the outside of the great room wall in an insulated chase below the roof overhang, but abandoned it for aesthetics and cost factors. At the end of the day, we made a choice to add supply ducts in the ceiling at the edge of the great room over the second floor “catwalk” where the attic space ended.
A few floor registers would be fed from below to get cool air to the room’s perimeter, and a large central fan would be installed on the main ridge beam to circulate air. Last, but certainly not least, we chose to insulate the cathedral ceiling with spray foam and fiberglass batts to bring the R-value to 60. The main message I have for anyone planning a log home is to take your time with rough-ins and do some walkthroughs, marking the locations of switches, cabinets, sinks, registers and outlets.
Do it more than once and adjust each time. It’s less expensive than having a subcontractor redo it down the line. As with most things in this process, a little time, patience and a few compromises will help complete that rough-in stage and free you up for the most fun of all … finishing (wow, did I just write that?)! Next time, I share how my wife Amanda and I invest a little sweat equity into the project, and we unveil our crowning jewel — our 4-foot-5-inch-high antler chandelier!
Sean’s Smart Tip
When doing your initial walkthroughs to determine lighting, switch and outlet placement, try to come up with real-world scenarios and test them out. For us, we asked ourselves, “If one of the kids has a bad dream and wakes up in the middle of the night, where do we want the lights and switches to be so we can get across the house to them (relatively) safely?” Then walk through it and make believe you are hitting the switches and seeing the lights turn on. There are lots of fun ones you can come up with … like “How can I sneak a midnight snack without waking up half the house?”
Join us as we continue to follow the Murphys, a young family who dreamed of owning a log home and are making that dream come true. Each issue we’ll check out their progress, learn from their missteps and cheer on their successes. In the end, we’ll see how they went from raw land to their own slice of log home paradise. See how far they’ve come at loghome.com/step-by-step-murphys.